In part 1, we installed and configured Hugo to run on a local machine. Now we’re going to publish the blog on the Internet.
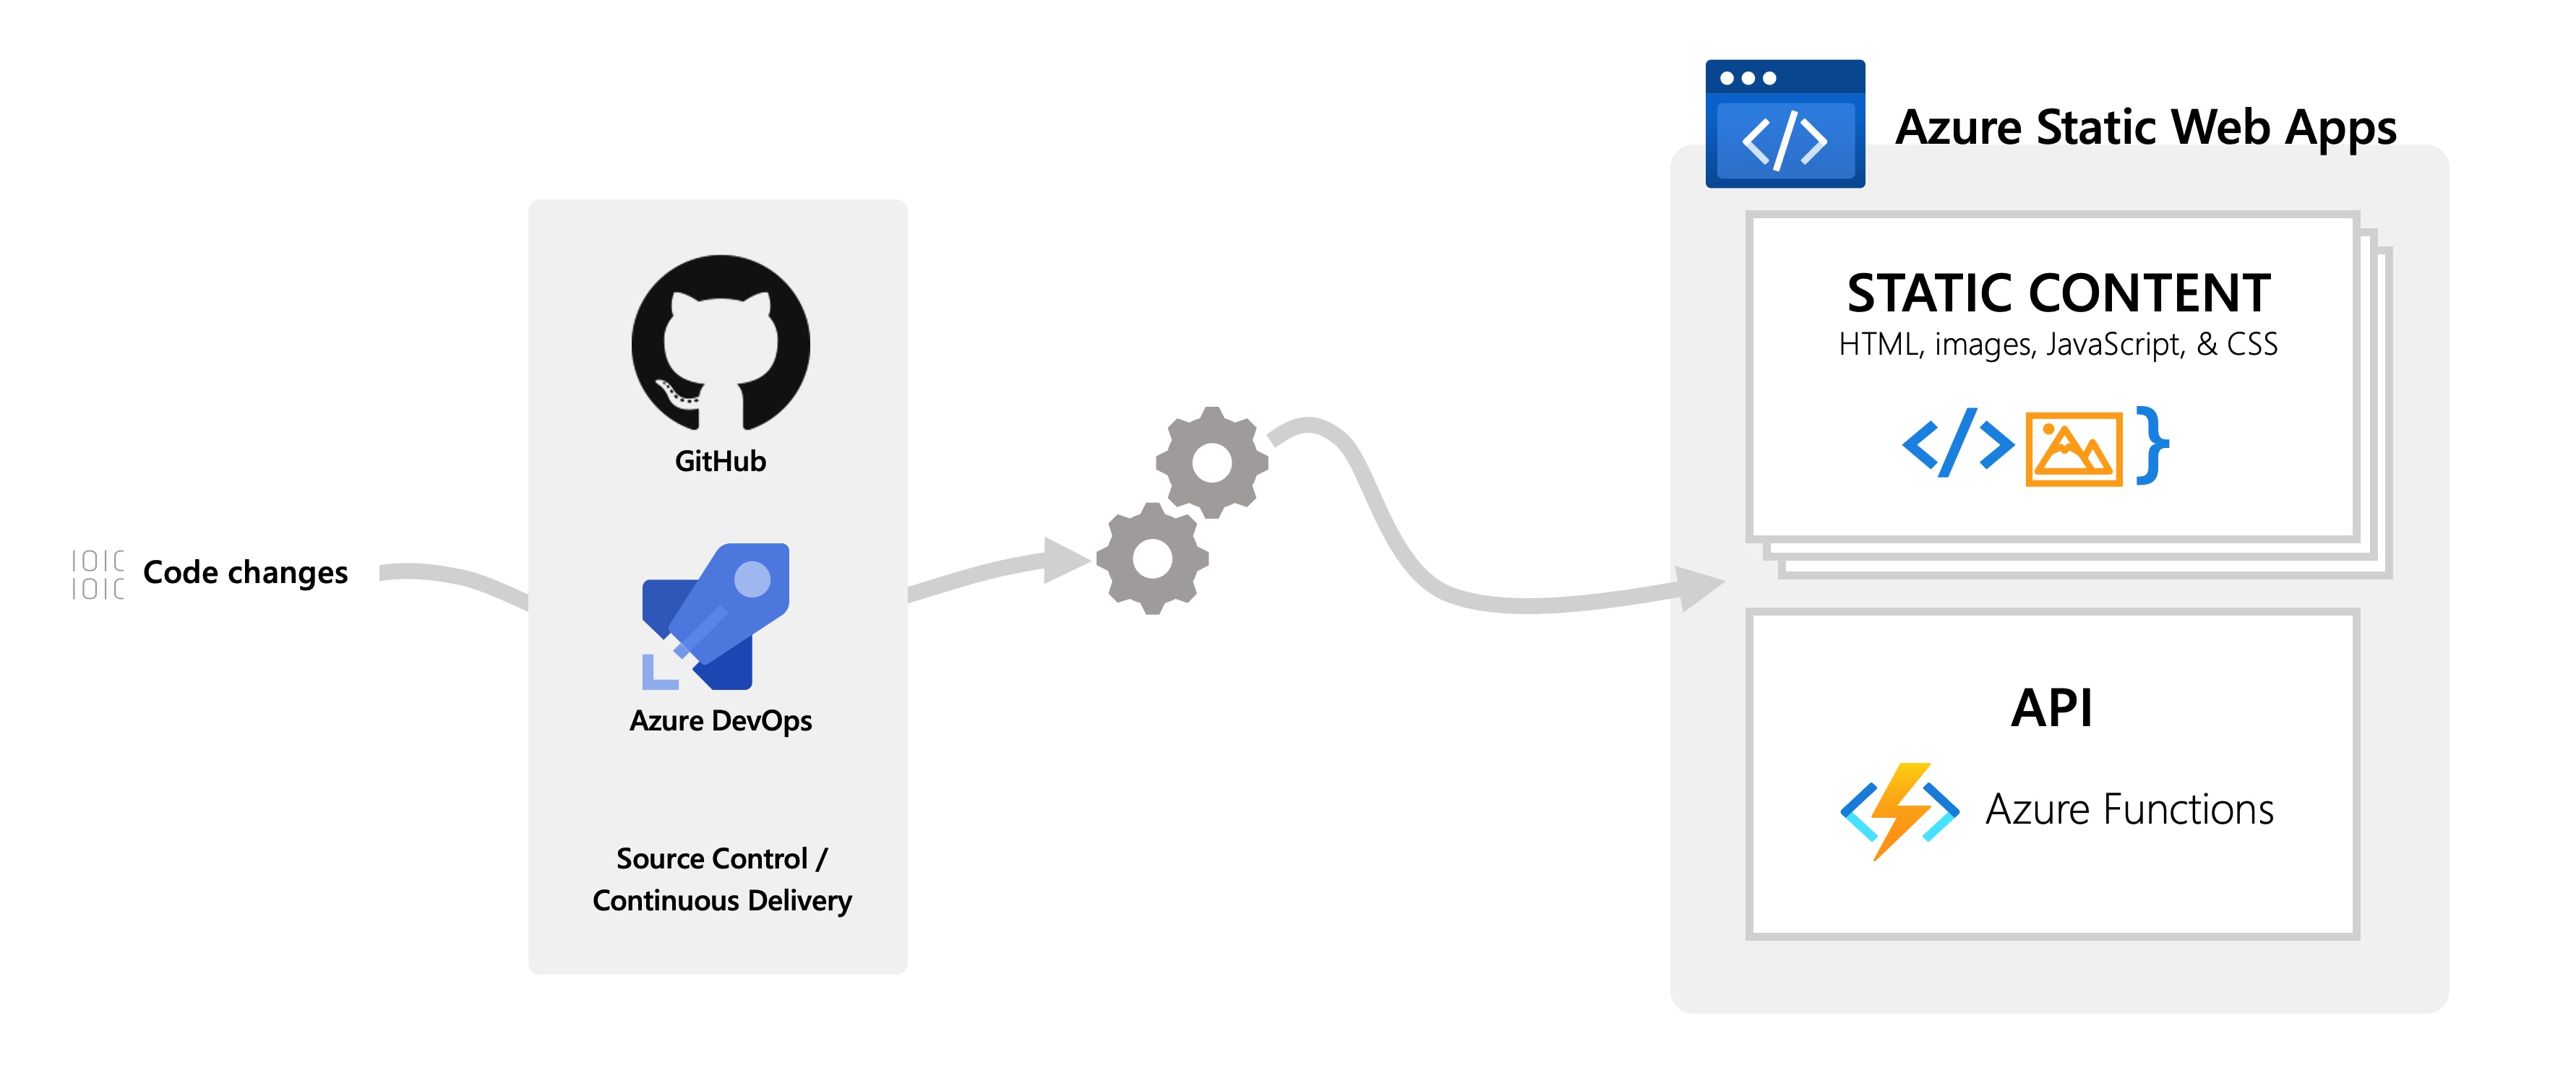
There are many ways to host a Hugo site. From AWS, to GitHub, Netlify, GitLab, CDNs etc. I was looking for a way to host the site for free and so I chose to explore Azure Static Web Apps in combination with GitHub and GitHub actions. Not only do Azure Static Web Apps offer a free tier, but you get up to 2 custom domains and a free TLS certificate. Static Web Apps can also host Azure Functions as well as the static content. It’s free to sign up to Microsoft Azure and you also get USD200 credits in the first month.
Creating a Static Web App
There are a couple of different ways to create an instance of a Static Web App - either manually in the portal, or via Infrastructure as Code with Bicep. Here, I’ll be showing how to create a Static Web App in the Azure Portal - we’ll come back to Bicep another time.
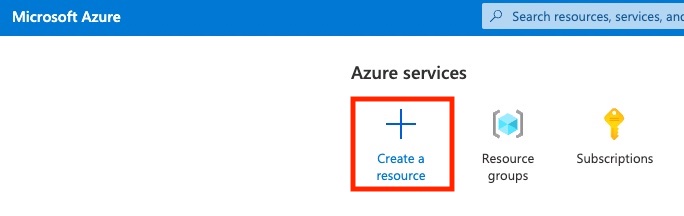
Once you’ve singed into the Azure Portal, you can create a new resource.
From the list of available resources, search for Static Web App.
When you click create, you’ll see a dialog like this, where you can create a resource group if necessary, choose the pricing tier, and set the location.
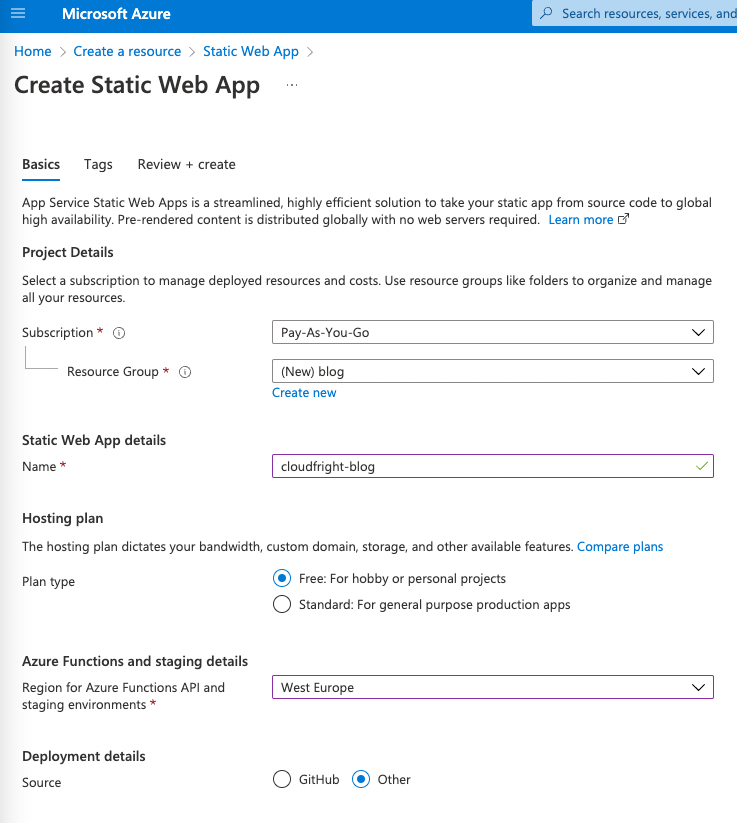 You can connect straight to a GitHub repository (and have a GitHub action automatically created), or set that up later. I’ll choose to configure that manually.
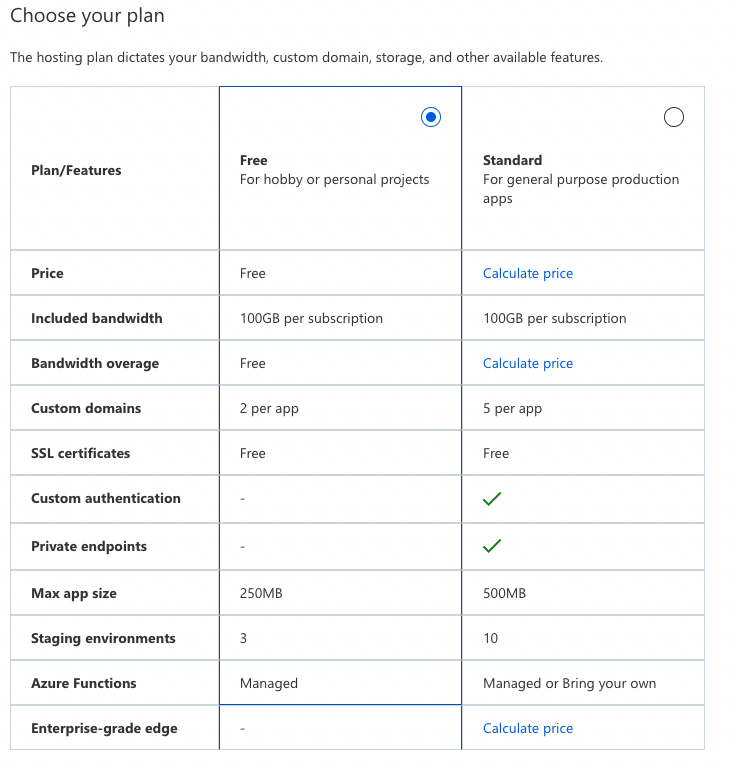
We’re going to select the free hosting plan which offers the following features:
Deployment configuration
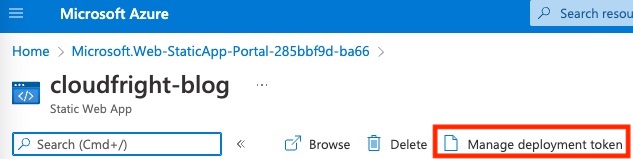
Once the Static Web App has been created, you’ll need get the API deployment token and copy that to the clipboard.
Next we’ll create a repository secret in the GitHub project by navigating the repository and choosing the Secrets / Actions menu. We’ll create a secret called AZURE_STATIC_WEB_APPS_API_TOKEN and set the value as the Static Web App API token we found in the previous step.

We need one last piece of configuration before we look at GitHub Actions to build and deploy the Hugo site.
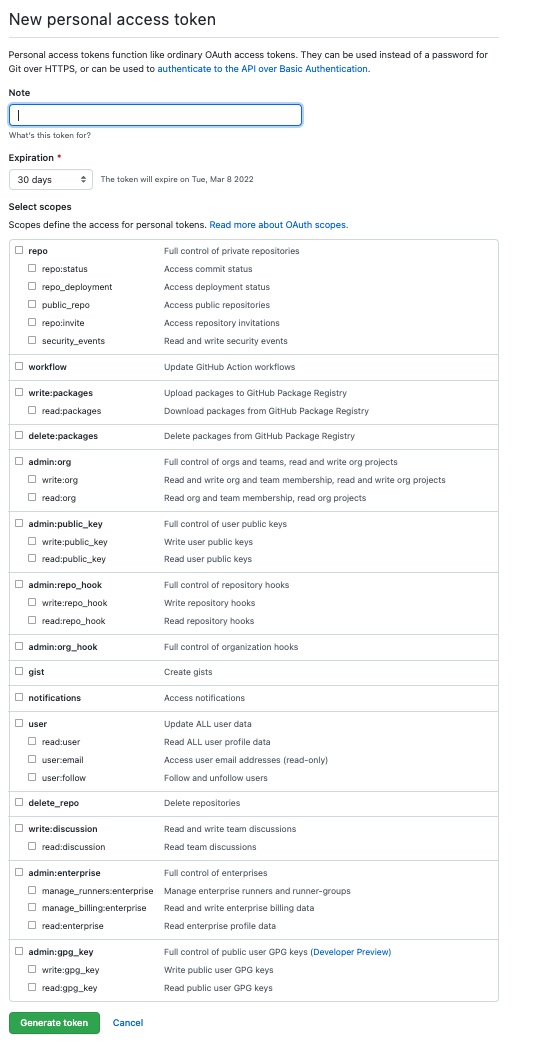
We need to create a GitHub Personal Access Token so the GitHub Action can access the repository.
Head over to your GitHub profile -> Settings -> Developer Settings and selecting Personal Access Tokens. Create a token by selecting the repo, workflow and write packages permission boxes.
GitHub Actions
Now comes the fun bit, let’s configure a GitHub action to build the Hugo site and deploy it to the Static Web App.
In your .github/workflows folder you can define a yml file like this:
name: Blog Build and Deploy
on:
  push:
    branches:
      - main
  pull_request:
    types: [opened, synchronize, reopened, closed]
    branches:
      - main

jobs:
  deploy:
    runs-on: ubuntu-latest
    steps:
      - name: Git checkout
        uses: actions/checkout@v2

      - name: Hugo update theme
        run: git submodule update --init --recursive

      - name: Hugo setup
        uses: peaceiris/actions-hugo@v2
        with:
          hugo-version: "0.92.0"

      - name: Hugo build
        run: hugo --source "./cloudfright-blog" --minify

      - name: Deploy to SWA
        id: deploy
        uses: Azure/static-web-apps-deploy@v1
        with:
          azure_static_web_apps_api_token: ${{ secrets.AZURE_STATIC_WEB_APPS_API_TOKEN }}
          repo_token: ${{ secrets.GITHUB_TOKEN }}
          action: "upload"
          app_location: "/cloudfright-blog/public"
So now we have a GitHub Action that will execute every time commit to main or use a pull request.
Custom Domains
The Static Web App creates a random URL, but has the facility to assign a custom domain. In this instance, I wanted to set the custom domain name to blog.cloudfright.com.
From the Static Web App, select Custom Domains
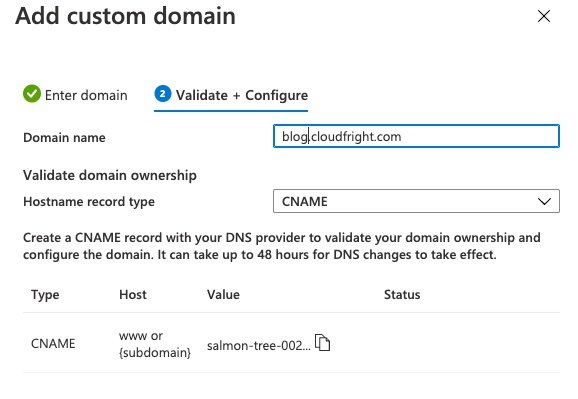
Then go to your domain management provider (I use dnsimple) and add a CNAME record, with the content provided by the Static Web App custom domain dialog. Now we’re all set to start contributing to our Hugo blog.
Summary
In this post, we created an Azure Static Web App in the Azure portal and configured a GitHub Action to build and deploy the Hugo site.
You can find the github repository for this blog here.
In part 3, we’ll look at options for gathering some web analytics and explore more of the Hugo configuration options.